There are thousands of add-ons pulling streaming links from the various sources. But, hundreds out of them don’t get much exposure among Kodi users. Some out of them get insane popularity but doesn’t last long because cybersecurity and other authorities keep an open eye every time.
Exodus was the most popular Kodi Add-on known for quality streaming links of Movies and TV Shows. A couple of years, the official Exodus was taken down. Later, many other developers copied the source code and made Kodi Forks of that addon.
Exodus Redux and Exodus v8 are the most popular Exodus Fork for Kodi. But, Venom is yet another great Exodus Fork for Kodi that pulling out HD video links from various hosters.
Here I’m back with the step-by-step process to install Venom on Kodi. If you want to get Venom TV shows on Firestick, then read the complete guide.
While exploring this add-on, I found that many users are getting Venom Not Working and Venom No Streams Available. Install the Venom Kodi Addon with these steps and you won’t face any such issue.
How To Install Venom Kodi Add-on?
Venom is available to install from Venom Repository. Follow these steps to install this add-on on Kodi –
1- Launch Kodi
First of all, you need to go to your Apps list and launch Kodi. Firestick users can go to Settings> Applications> Manage Installed Applications> Show App> Select Kodi> Launch. Or you can simply press the Home button and Firestick remote and go to Your Apps and Games list> select See All> then select Kodi to launch.
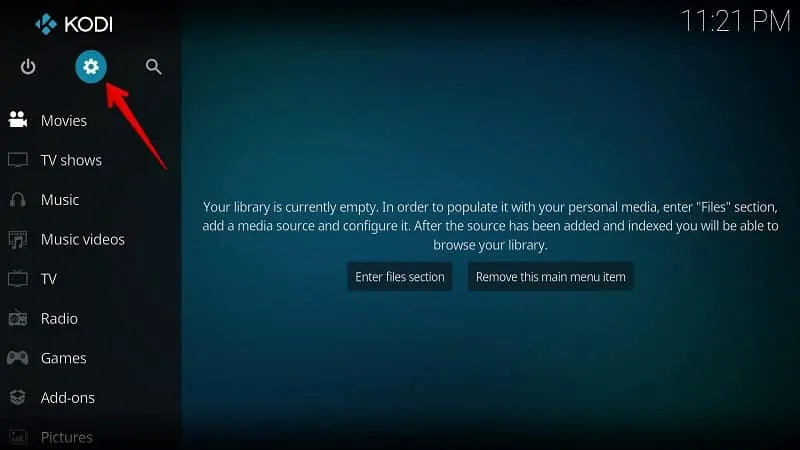
2- Go to Settings
You’ll see a gear looking icon of the left side of the TV screen, select that. Refer to the image below to recognize the Settings icon.
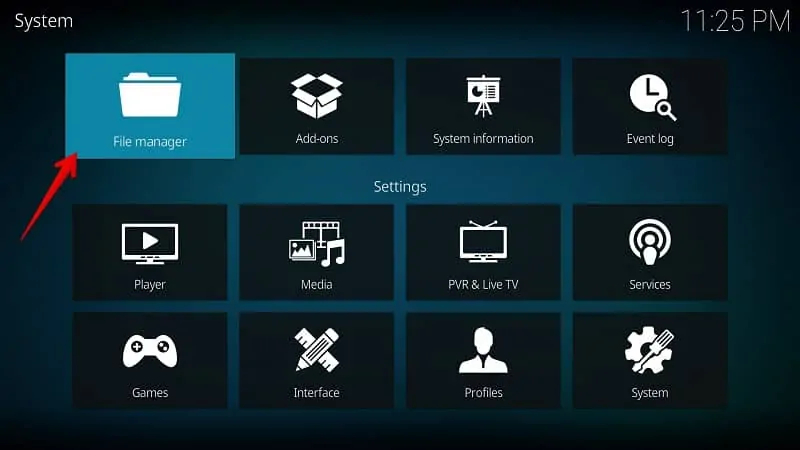
3- Select System Settings
At the bottom corner of your TV screen, you’ll find a System option. Using your remote, select that option.

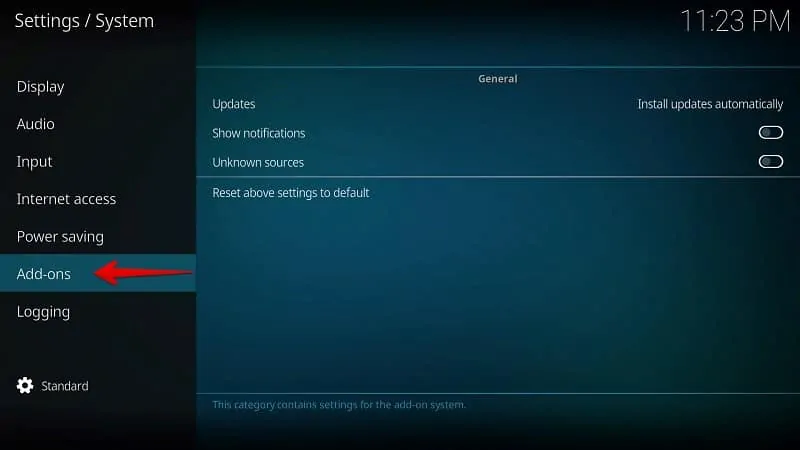
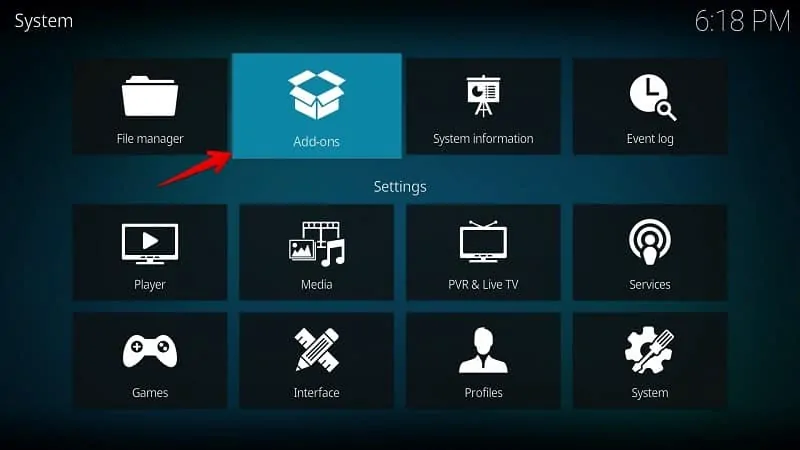
4- Select Add-ons
A similar interface as given below will on your TV. Select Add-ons option from the left navigation.
5- Select Unknown sources
By default, Kodi keeps this option disabled to prevent third-party installation. But, I’m sure only official add-ons are not enough for you. So, in order to install unofficial addons for Kodi, you need to enable Unknown sources on your device.

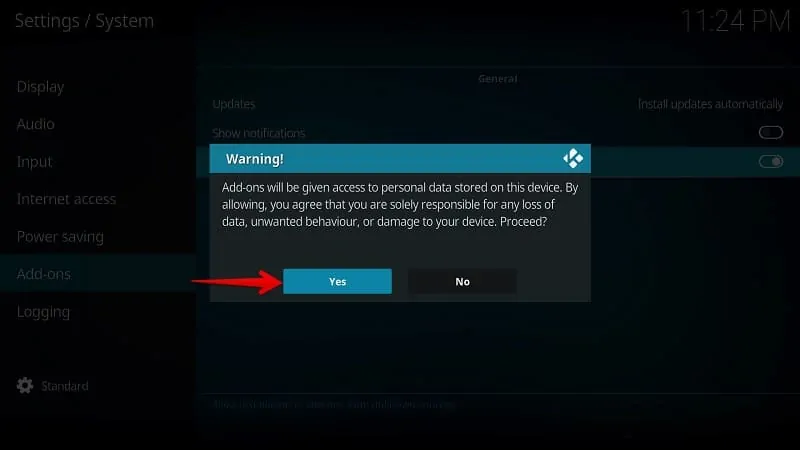
6- Select Yes
You could find a Warning popup on your device screen. If you use a secure VPN and install the add-ons from a trusted source, you won’t face any issue. So, ignore this popup and select Yes to continue.
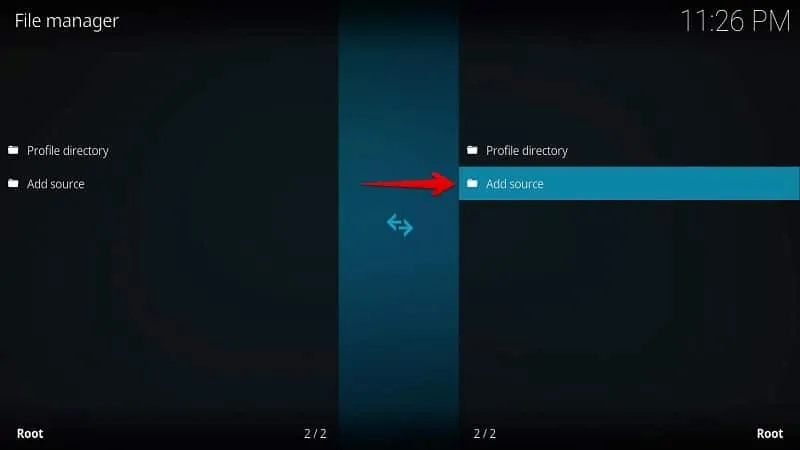
7- Go back and Select File Manager
Just press the back button on your Firestick remote or Backspace button on your PC to see this screen. Select File Manager option to enter the repository details.
8- Select Add source
Here you need to add a file source to install any third-party addon. Click/Select Add source option.
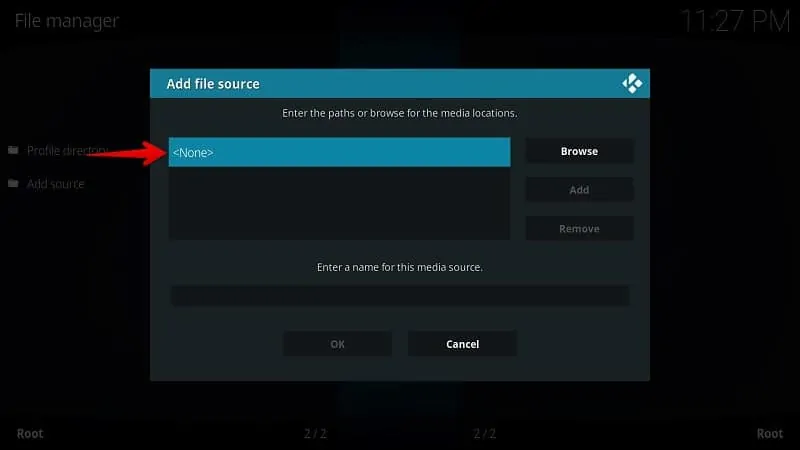
9- Select <None>
You can see an empty file source. Select the <None> option to enter the media source address.
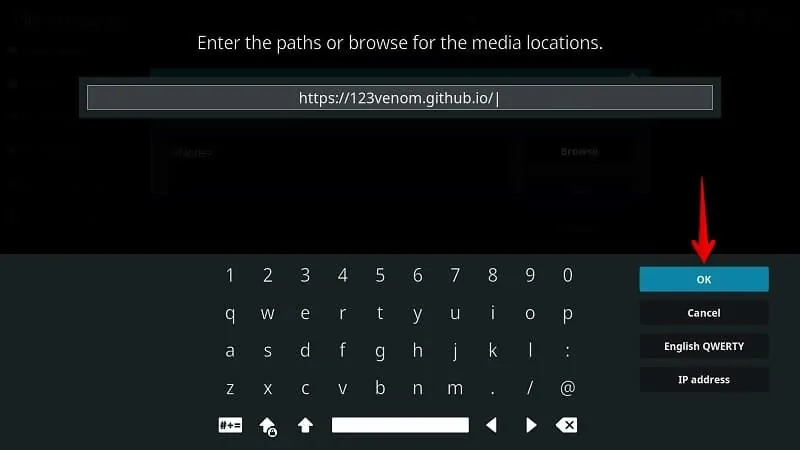
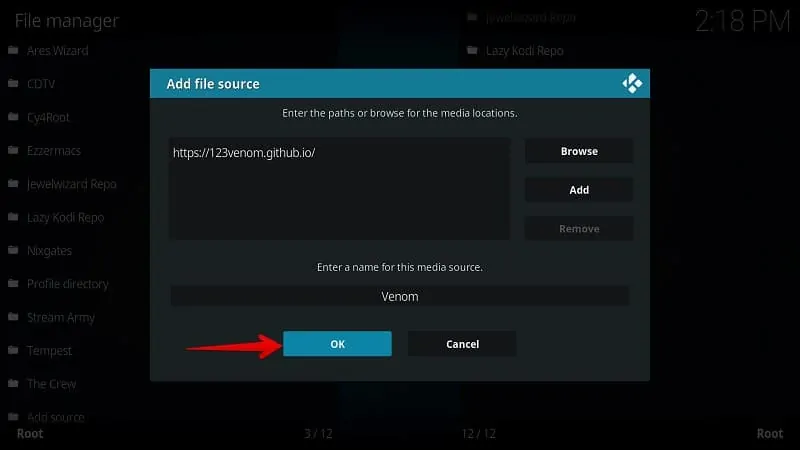
10- Enter a Source URL
Here you need to enter the Kodi Repository address (Media Source) from where you want to install that add-on. I’m entering the repository source of Venom and here it’s located – https://123venom.github.io/ and then select OK.
11- Enter a Source Name
In order to recognize in later steps, I’m naming it as – Venom. But, you can enter anything here. I generally put the Addon or Repository name as Media Source Name for understanding.
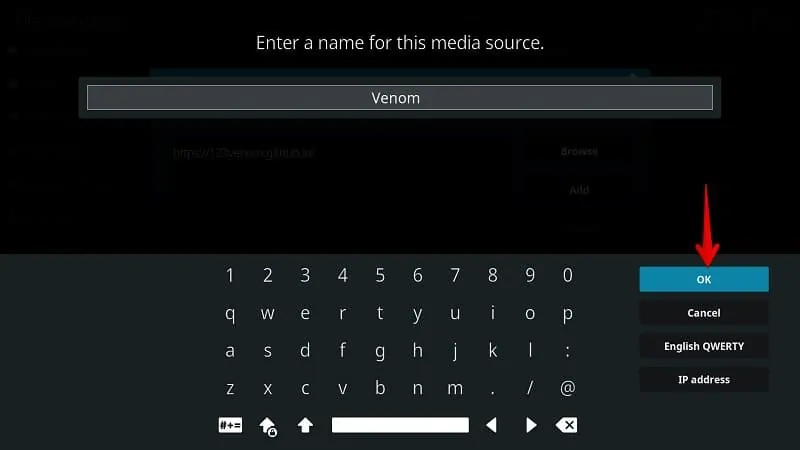
12- Save Media Source
I recommend you, review this again. Make sure you entered the correct URL in the box and remember the source name. Select OK to save it.
13- Go back and Select Add-ons
Once again, press the Back button on Firestick remote or Backspace key on your PC keyboard. Select Add-ons option from here.
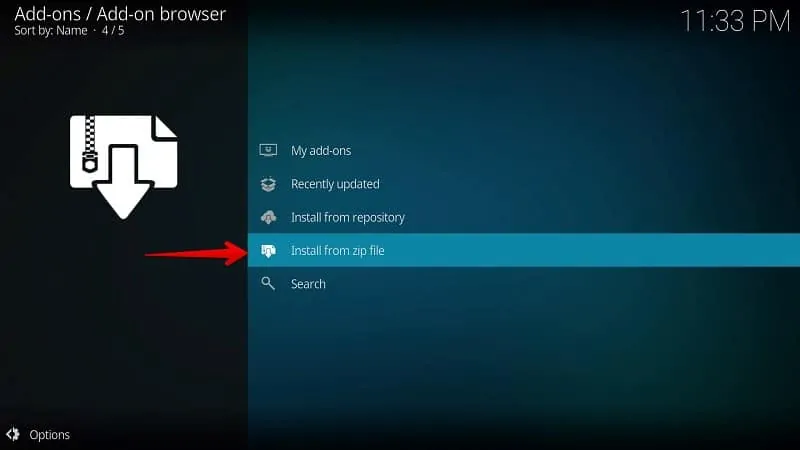
14- Select Install from zip file
You’ll get a screen like this on your device. Here you’ll see several options. Select Install from zip file to go further.
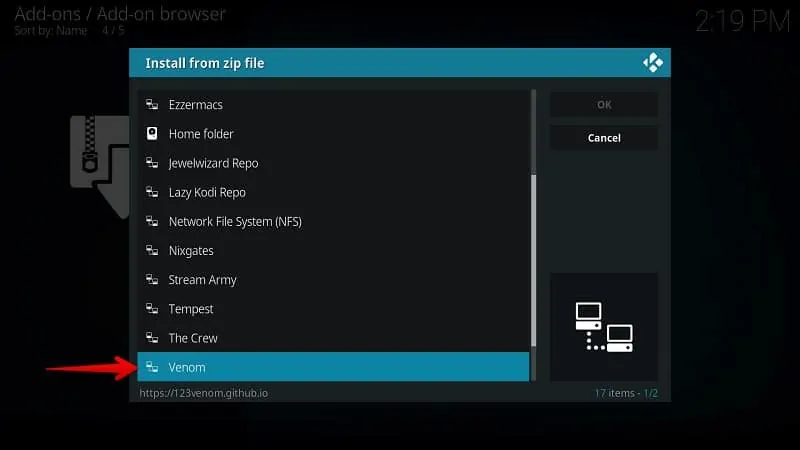
15- Select Media Source Folder
If you remember, In Step #11, I asked to enter a media source name that you can recognize later. So, select the source folder to find out the repository file. I’ll choose Venom here because I entered this name during adding a media source.
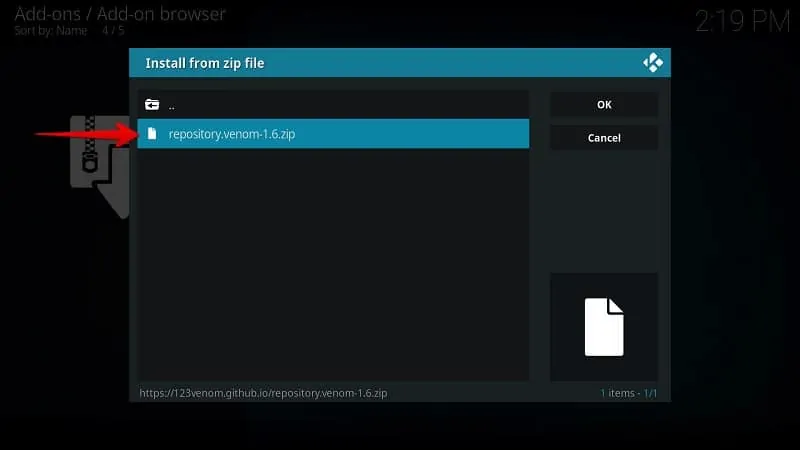
16- Select the Zip File
Here you can see a Zip file for Venom Repository installation. Select repository.venom-1.6.zip to install on your device. Here X.X.XX is the current version of that repository. You may see a different version once the developer updates it.
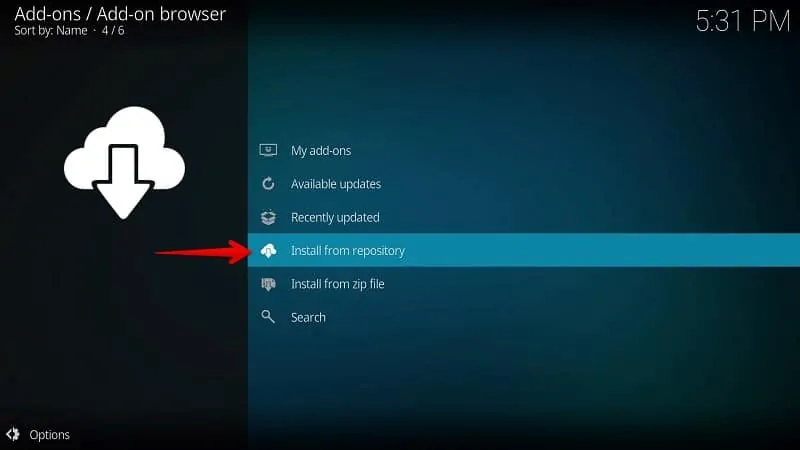
17- Select Install from repository
Please wait for a few seconds till repository zip is installed on your device. Now select Install from repository to proceed forward.
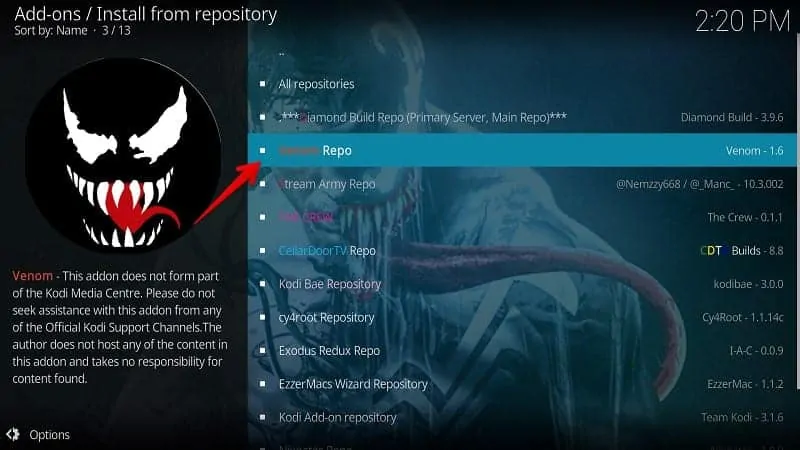
18- Select Venom Repo
You can see the Venom in your repository list. Select Venom Repo to install this add-on.
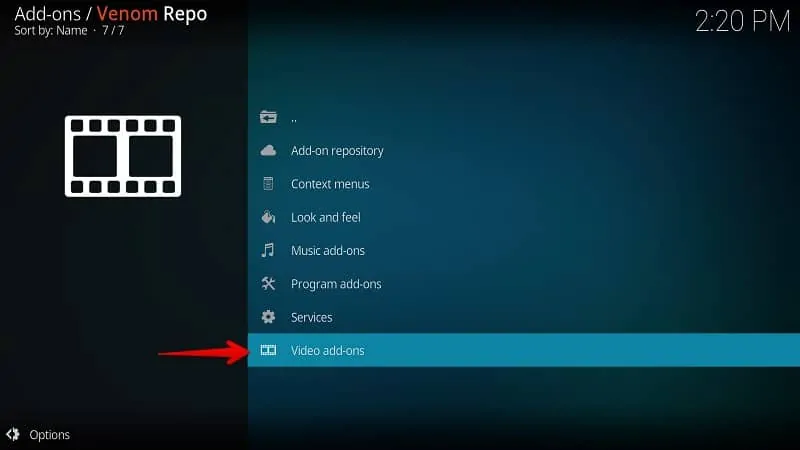
19- Select Video Add-ons
From the various options displaying on your TV screen, select Video add-ons.
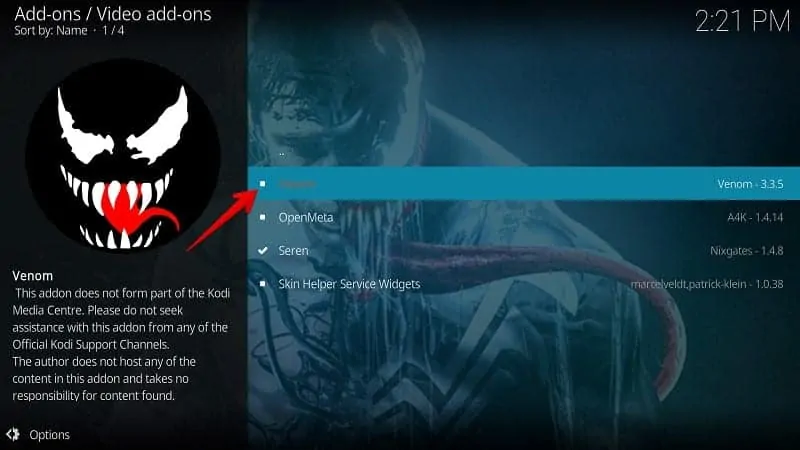
20- Select Venom
Select Venom from your repository video add-ons list.
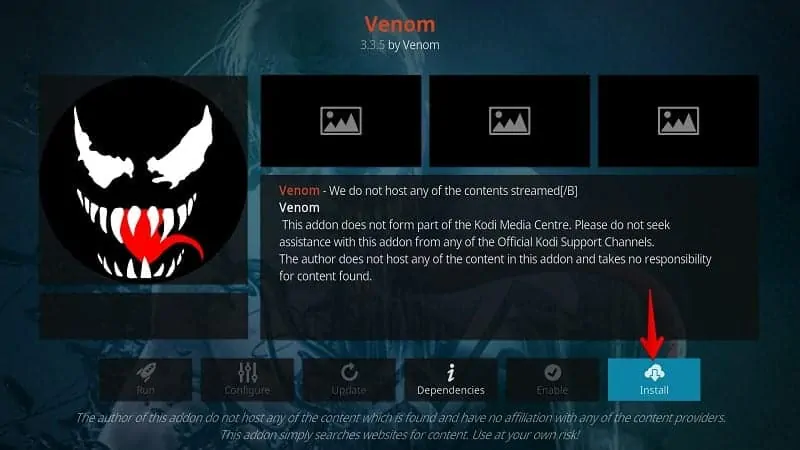
21- Select Install
Select/Click on the Install button to begin the installation of Venom add-on on Kodi.
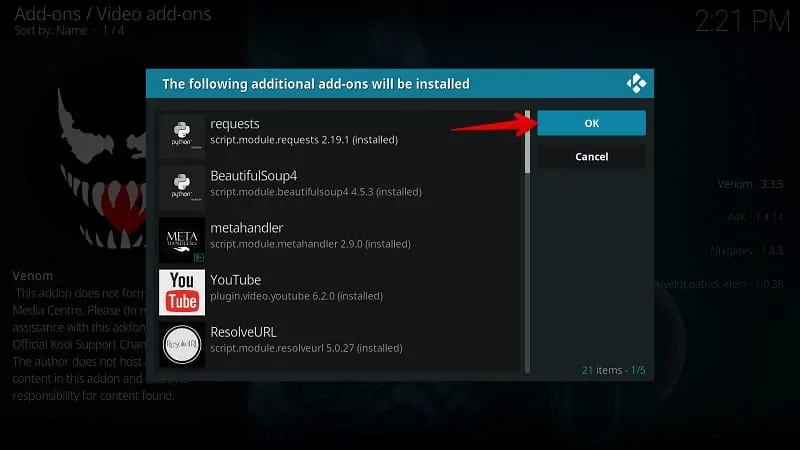
22- Select OK
This add-on requires some additional add-ons and scripts to run properly. Click OK to make it work.
23- Open Add-on Folder
You’ll get a notification that Venom Add-on installed. Now, select the folder to open it.
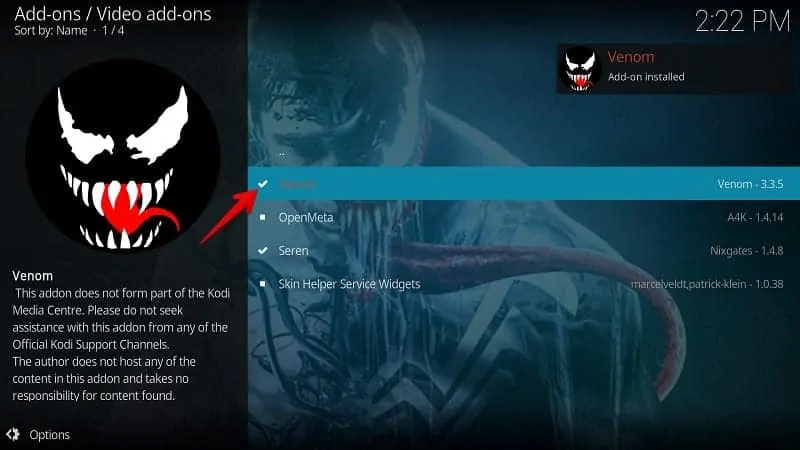
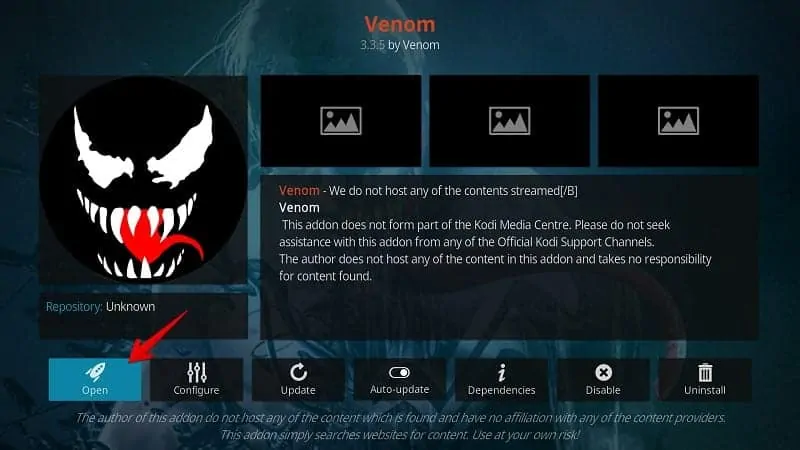
24- Select Open
Select the Open option to launch it on your device. Else, you can go to Kodi Home> Add-ons> Video Add-ons> Launch Venom.
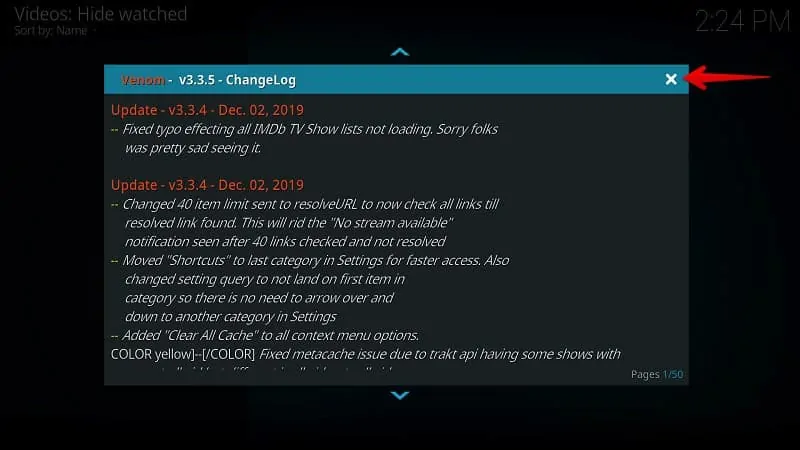
25- Close the Popup
You can see a changelog popup on your device. Close it and start enjoying Venom on Kodi.
Final Words
You’ve got the best Exodus Fork on your Kodi. Now, you can watch anything provided by this addon. The Venom also allows you to keep track of your streaming activities through Trakt.tv account integration. Also, you can authenticate the Real-Debrid account for better and 4K HD streaming links.
I hope you enjoyed this tutorial… I request you to please come forward with your feedback in the comment box below.
Enjoy…!